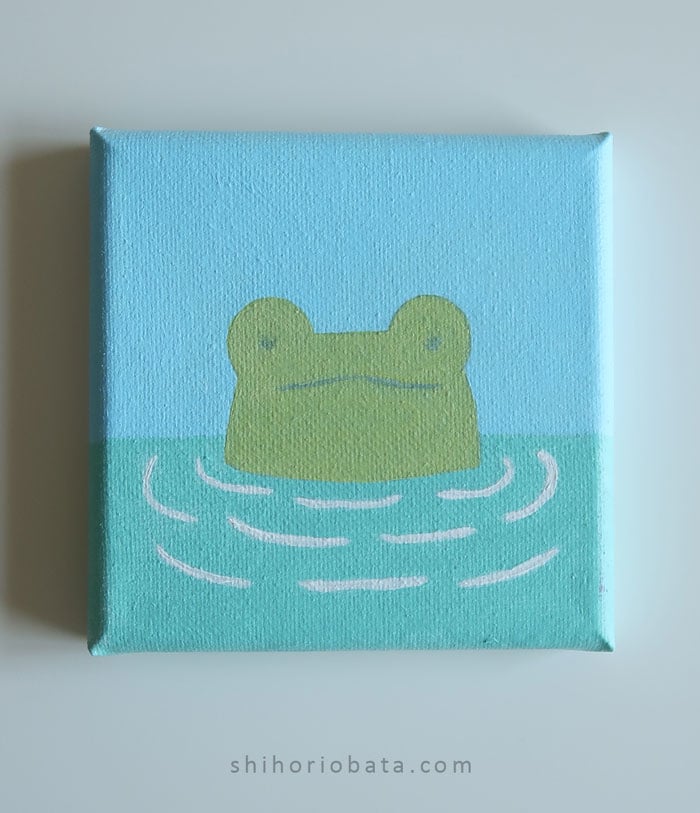
Let’s create an easy frog painting today!
I love drawing frogs so I decided to create a frog painting for you all to try out as well!
Painting is a great way to have fun and relax, while also creating a piece of art you can enjoy and decorate your room with.
In this blog post, I will be showing you how to create a frog painting using a mini canvas and acrylic paints with step-by-step instructions.
I hope this helps any beginner artists looking to explore acrylic painting in a fun way!
Materials Needed:
- Canvas (I used a 4×4 inch canvas): I got mine from Michaels in a 2-pack
- Acrylic Paints: You don’t need the same exact paint colors as me. Please use what you have on hand but I will list the exact colors too. Light Blue, Turquoise, Green, Yellow, White, Black, Pink (optional) (The exact colors I used are Golden’s Light Phthalo Blue, Master’s Touch Ocean Green, Titanium White, Primary Yellow, Winsor & Newton’s Pale Olive, Black, Amsterdam’s Light Rose)
- Paint brushes
- Cup of Water (to rinse your brushes)
- Paper Towel: to dry off excess water from paint brushes
- Shallow Dish: to mix paint colors in (I use empty plastic food containers)
- Pencil
- Varnish (optional): Acts as a final top coat over the paint.
- Black art pen (optional): To color in eyes and mouth (You can use a detail paint brush as well)
Now let’s get to painting! I hope you enjoy!
Step 1: Sketch Out Your Frog
On your canvas, sketch out your frog using a pencil.
It’s okay to make mistakes! You can erase it if you’d like but it’ll all be covered by paint in the end.

Here is the drawing this painting was inspired by from my blog post 23 Easy Frog Drawing Ideas (#9).

Step 2: Paint the Sky
Next, we’ll be painting the sky.
I used Golden’s Light Phthalo Blue, but feel free to use any light blue you have. Or paint the sky whatever color you like!
I only painted 1 coat. We’ll be painting more coats as we go along, so let’s let our first coat dry in the mean time.
Also, don’t forget to paint the sides of the canvas!

Step 3: Paint the Water
Let’s paint the water next!
I painted it a turquoise-ish color.
The exact color I used is Master’s Touch Ocean Green. Paint the water whatever color you like or have on hand!
Again, I only painted 1 coat for now so that I can still see the pencil marks.
Make sure to paint the sides of the canvas too!

Step 4: Paint the Ripples
Use a small, detail brush to paint the water ripples.
I used Titanium White and only applied one coat for now.

Step 5: Paint the Frog
Paint your frog green next!
I ended up changing the frog’s color from this dark green to a lighter, more yellow green in the end.
Painting is a process and it’s okay to make mistakes and change your mind about colors 🙂 You can always paint over it.

Step 6: Paint Second Coats
Now that we’ve got most of our colors on our frog painting, let’s paint our second coats!
I painted a second coat for the sky, water, ripples, and frog.

Down below is what it looks like after the second coat is added on to everything.
As you can see, I did end up making the frog lighter and more of a yellow green.
To do this, I mixed the original green color (Winsor & Newton’s Pale Olive) with a bit of white and primary yellow.
Try to leave some of the pencil marks for the eyes and mouth so that we can paint those later.
Feel free to paint more coats too! Some colors are more translucent than others and thus need more coats of paint.

Step 7: Paint the Eyes and Mouth
I used black paint and a small brush to paint the frog’s eyes and mouth.
You can also use a thick art pen if that helps you have more control with the line.
If you make a mistake (Like I did lol), you can paint over the mistake with a couple layers of the green.

Step 8: Paint a Heart (Optional)
I ended up adding a little heart above the frog’s head because I thought it’d be cute!
I used a light pink. Feel free to skip this step if you’d like too.
This is also an optional step, but once you feel completely satisfied and finished with your painting, feel free to coat it in varnish. (I advice professional artists to always varnish their work, but we are just doing this for fun so this step is optional!)
It will help to protect your painting, especially from UV light. It will also make the colors more cohesive. Gloss varnish can also add more depth to your colors.
I personally like to use matte varnish most of the time.

Step 9: Enjoy Your Painting!
Yay! We are done with our frog painting now!
Hang it up on your wall or decorate your shelf with it.
You can also prop it up on a mini easel to showcase your artwork!

Related Blog Posts:
Easy Bear Painting Idea
Thank you so much for visiting this blog post!
I hope you enjoyed this adorable little frog painting idea 😊
If you are looking for other art ideas to try out, feel free to look around my blog! There are so many ideas to choose from!
I am wishing you a wonderful day or night and until next time!
Keep creating!
