Creating digital art is a fun and great way of branching off from traditional art.
However, as artists, it’s important to share your art with an audience so that eventually, we can make a living doing what we love – creating art.
So here is a guide on how to upload digital art to your Instagram – so that you can share your digital art with the world.
Instagram is one of the best social media platforms for artists because it is so visually-driven. It’s a great way to not only find your art-lovers and customers, but also find connections with the art world.
I hope this blog post is helpful to those who are new to Instagram and need a basic guide on how to upload your art to Instagram.

The Basics: How to Upload Art to Instagram
Download the Instagram App from the App store on your phone or tablet.
You can view Instagram on your computer through their website, but you can only post to Instagram through the mobile app.
Log in to your Instagram account or create a new account if you don’t have one.
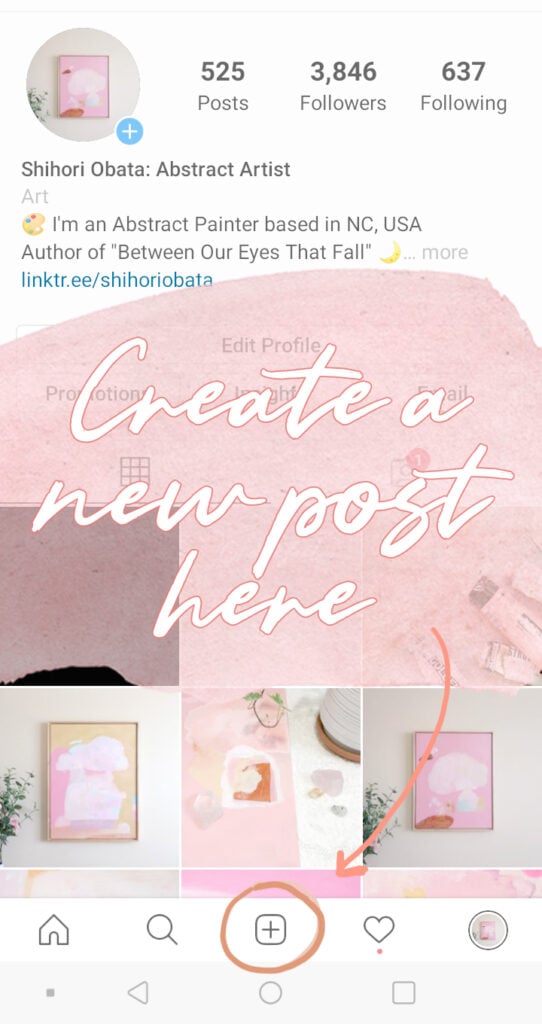
At the bottom of your screen, you should see a + sign: This is how you upload a new post to your Instagram feed.

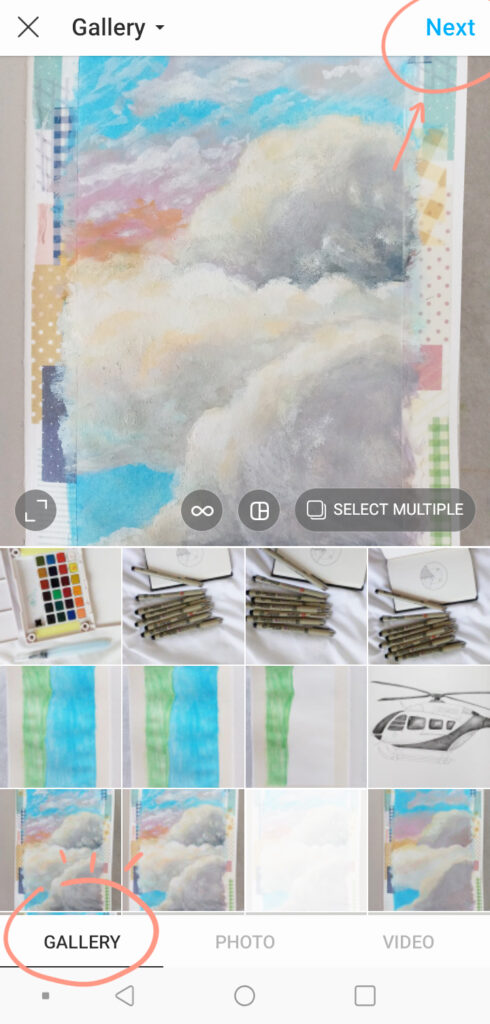
Choose the image you want to upload through your Gallery and hit Next (top corner of your screen).

Make any new adjustments if you like (Brightness, Filters, etc). Then hit Next.
Tip: If you want to make extensive color adjustments to your art, I recommend doing it beforehand through apps like Snapseed, VSCO, Lightroom, etc. There are many photo-editing apps out there that are free to use in the app store.
Write a caption and include hashtags. You can also Tag other accounts related to your photo or Add a Location.
Then hit Share in the top corner – And you’re done! You’ve just uploaded your art to Instagram!
How to Upload Digital Art to Instagram
If you created your digital artwork on a tablet, you can save your art and post it directly to Instagram as long as you have the Instagram app on your tablet.
Uploading digital art to Instagram requires a few extra steps if you have created your art on a computer.
This is because you can only post to your Instagram through the Instagram app on your mobile device (with the exception of third-party apps).
Therefore, your digital art will have to be transferred from your computer to your phone.
Here are a few steps and tips to help make the transferring process easier to understand for those who need a little extra help with posting their digital art to their Instagram.
I hope this helps!
How to Save Your Digital Art
In most programs, your digital artwork can be saved by going to File > Save As.
I personally like to save art in two different file types: One that is large with as little compression as possible. Then one that is a smaller, compressed file that can be easily uploaded to the web or Instagram.
For the larger file size, I usually save it as a PSD (Photoshop file) if I’ve created it in Photoshop. That way I can open it again with all the layers and image quality at its highest. This can also serve as a backup file. TIF and PNG files also work this way.
For the smaller file size, I usually save it as a JPEG file. JPEG files are always compressed to some degree, but this makes it easier to upload to the internet or Instagram.
For the purpose of uploading your artwork to Instagram, save your file as a JPEG file.
Instagram’s image size limit is 1080 pixels wide.
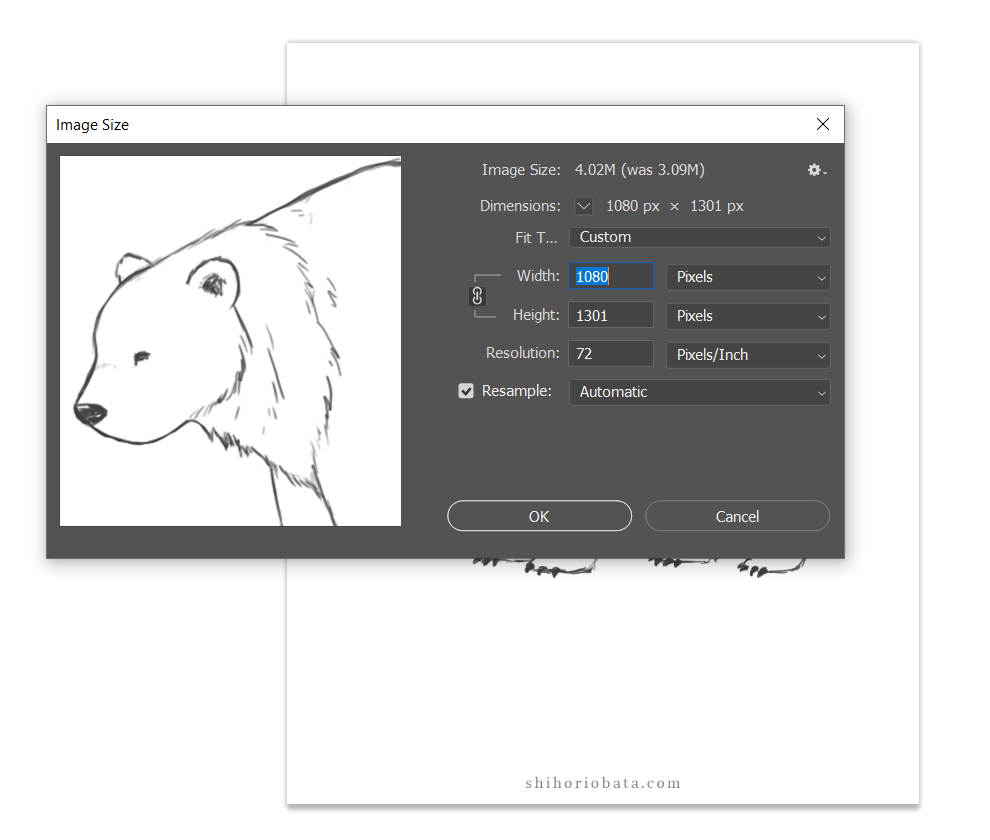
If your artwork has a width dimension greater than 1080 pixels, make sure to resize to the appropriate dimensions before saving. In Photoshop, this can be done by going to Image > Image Size and readjusting the dimensions.

- Width: 1080 pixels maximum
- Resolution: I kept it 72 dpi, but this number doesn’t matter too much (More important for printing)
- Best if image can be cropped to be Square (1:1 ratio) or Portrait (4:5 ratio)
If you try to upload an image that is greater than 1080 pixels wide to Instagram, your digital art may become pixelated in the process. This is because your image size is larger than what Instagram allows (1080 pixels wide) and is automatically compressed through their software.
If you have a large image, I highly recommend the process of first saving a backup file of your art at its original size. Once this backup save file has been created, readjust your image size to 1080 px at its widest. Then, save your new, re-sized image as a JPEG file.
This is the file you will upload to your Instagram.
How to Transfer Your Digital Art from Your Computer
There are several ways to transfer your digital art from your computer to your phone or tablet.
One way is by emailing your compressed digital art (JPEG file) as an attachment. Most people have emails and all you need to do is email the file to yourself.
As long as you have email on your phone, you can then download that attachment and you will have it on your phone to upload it to your Instagram account.
Another way is through Google Drive, Dropbox, or iCloud (for Apple devices). When you upload a file to these cloud storage options, the file will be available on any of your other devices as long as you have access to these file storages.
Another way is by connecting your phone to your computer through a USB connection. You can then copy and paste the digital art file from your computer to your Photos Folder in your phone (Often named DCIM).
After you have successfully transferred your artwork from your computer to your phone or tablet, you can now edit it or upload it straight to your Instagram.
Follow the instructions at the beginning of the blog post on how to upload art to Instagram.
Tips for Uploading Art to Instagram
Add a Watermark
Consider adding a watermark on your Instagram images, especially if you are an artist.
Watermarks can be easily added by just writing text (whether it be through Photoshop or an editing app).
Make it small and discreet so it doesn’t take away from your artwork, but also make it legible so that people can find your work.
When you post any artwork on any platform, it has a chance of spreading through other platforms such as Pinterest, Reddit, Blogs, other Instagram accounts, and more.
That is why it is so important to add a watermark, so that those who stumble upon your image will know exactly where it came from.
Plan Your Feed
Using a Instagram feed planner (Such as Planoly) can be helpful to those who want to create a cohesive Instagram feed.
It’s a great way to see if the next post you create matches the theme you have in mind for your Instagram account.
You can then switch around images so that it better suites you Instagram aesthetic.
The aesthetic of your feed is one of the best ways to gain more followers to your Instagram account because it gives your account a more professional and artsy vibe.
More Tips to Grow Your Instagram
For more tips on how to grow your Instagram as an artist, check out this blog post I wrote about getting your art noticed on Instagram.
Related Blog Posts:
14 Ways to Get Your Art Noticed on Instagram
200+ Instagram Art Hashtags for Artists
How to Photograph and Edit Art to Upload Online
How to Promote Your Art on Pinterest
Thank you for stopping by this blog post. I hope it was helpful for any artists out there who want to get started on promoting their art on Instagram.
I wish you the best on your Instagram journey and most of all, have fun along the journey.
Until next time, take care!

Hello Shihori, thank you for the helpful tips…how do we protect our art from being plagiarized (with so many softwares available to even remove watermarks)? Or is that an unavoidable evil that comes with publishing on Instagram?
I personally do not know of a way aside from watermarking to protect your art. Depending on the artwork, sometimes uploading as small of a file size online (while maintaining image quality) helps so that it cannot be easily recreated to a high resolution. I believe Instagram already compresses files however. Thank you for your comment!